A simple, very cosy, neck warmer with just one working button. Get your ‘good’ fabric out that has been too nice to use and create a fabulous show piece for it. Also a great excuse to get the buttonhole foot out and give it a go!
- Outer fabric, we have used Robert Kaufman Flannel (view here), cut to 10″ x 33″ / 25 cm x 85 cm.
- Inner fabric, here you want something soft and warm like fleece, cuddle fleece or sherpa. We have used cuddle fleece (view here), cut to 10″ x 33″ / 25 cm x 85 cm.
- Scrap of interfacing for stabilising button hole.
- Button, we used one 1″ in diameter.
Fancy giving it a go? We have a supply kit to make your own for £10. (click here).


We cut a rectangle measuring 10″ wide x 33″ length in our Robert Kaufman Flannel and in dark grey Cuddle Fleece.
Place the fabrics, right sides together, and pin together.


Sew using a seam allowance of around 1cm (1/2″). I actually used the squares to my advantage, lined up my sewing foot (here I used a walking / even feed foot) and followed the lines. Remember to leave a gap for turning, this is best positioned in the centre of the longer side.
Trim the corners to reduce the bulk. If you have pinking shears, you can use them to trim the edges.
Iron on a strip of interfacing / stabiliser to one short end. This is where you will be sewing your button hole(s).
Turn the neck warmer right sides out, through the gap. Push out the corners and press. Press the open seam straight, with seam allowance tucked inside, ready for hand sewing at the end.


Lay the scarf horizontally in front of you, working on the top right corner. You want your button hole be an inch down from the top and 5/8″ in from the side edge. My button is 1 inch in diameter, so I have marked 2 inches down (1 inch down from the top plus the button 1″ diameter).
Look out your button hole foot, if you have one, and sew your button hole. If you are not familiar with creating a button hole, please refer to your sewing machine manual. It will have instructions and settings particular to your machine. I chose a stretch button hole, which is not as tightly sewn, giving the machine a chance to glide over the cuddle fleece better.
Place a pin along the top edge of your stitched button hole, to protect it from being accidentally cut further, use your seam ripper to make the initial cut open. Either continue with your ripper, use a small pair of scissors or a button hole cutter.


Hand sew the gap shut, ladder stitch is an invisible stitch where you sew along the pressed fold alternatively on either side. It’s my go to hand sewing stitch.
Lay your ‘almost’ complete neck warmer right side down, with button hole top left hand side. Fold the right side over and down at an angle, according to the above photo, then fold the left side over on top of the right side, matching up the points. You can see me pointing at the button hole. Mark where the button is to be sewn, either with a vanishing marker, chalk, pin or tailors tack. Sew your button and hey presto! You’re finished.


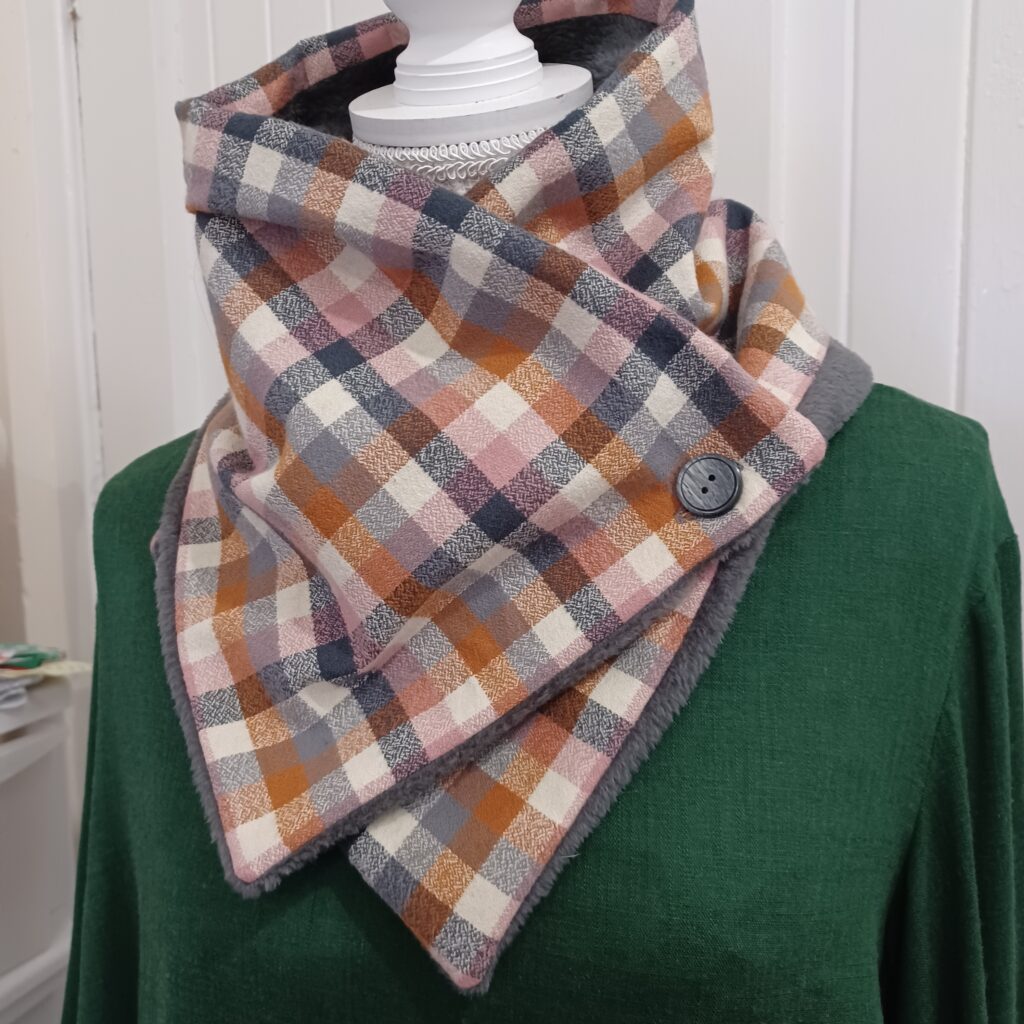
Beautifully modeled by Fiona, just so happens she is wearing a perfectly matching outfit today, including pink hair – just fabulous And there’s me in my christmas jumper pointing at the fabric used. You can see we are wearing the neck warmer slightly different from each other. You could sew another button further down from the first, creating a less fitted look.