
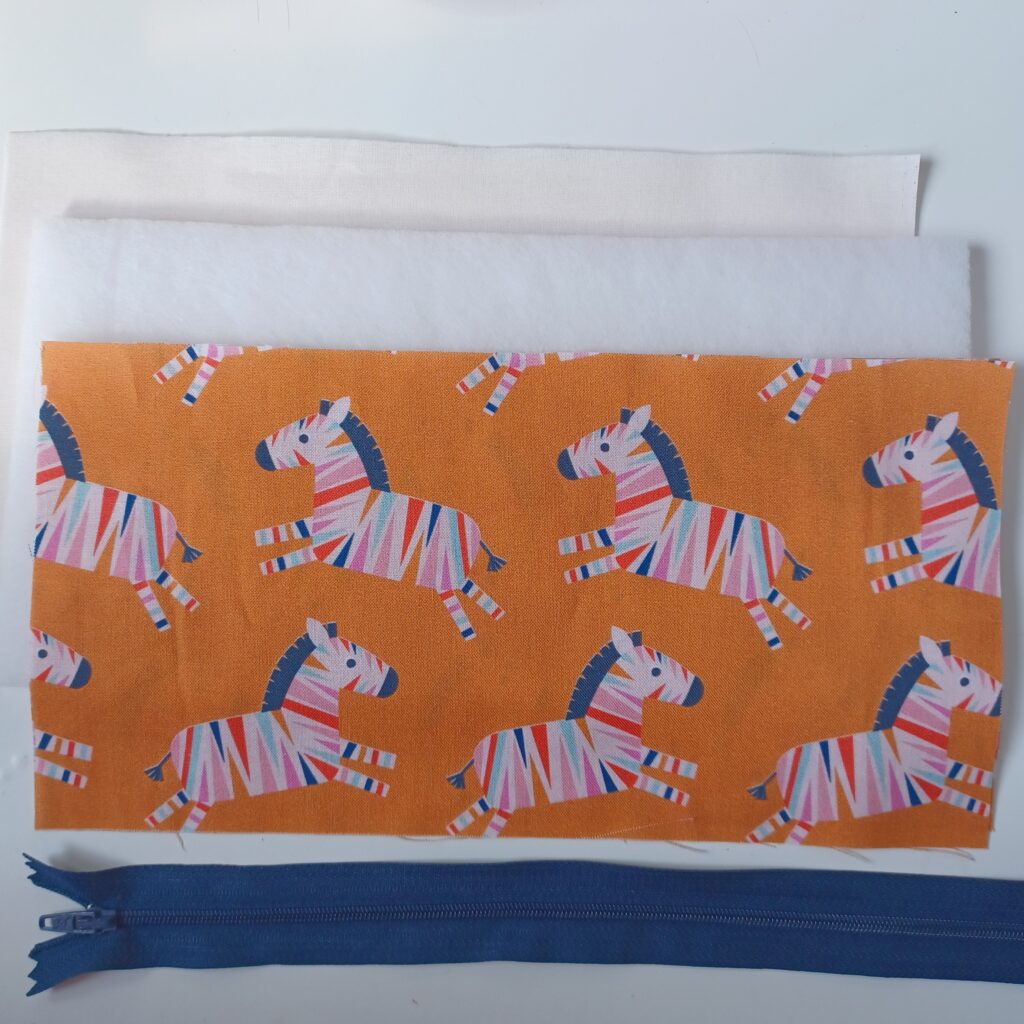
Materials:
2 x outer fabric, 10″ wide x 5″ length. (Dashwood Studio Zebra 100% Cotton)
2 x fusible interfacing, 10″ wide x 5″ length. (We used fusible fleece Vlieseline H640)
2 x lining fabric, 10″ wide x 5″ length (Cream cotton)
Zip length, minimum 9″ but works easiest with a longer zip which you trim down after sewing in. In these samples my zips are 16″.
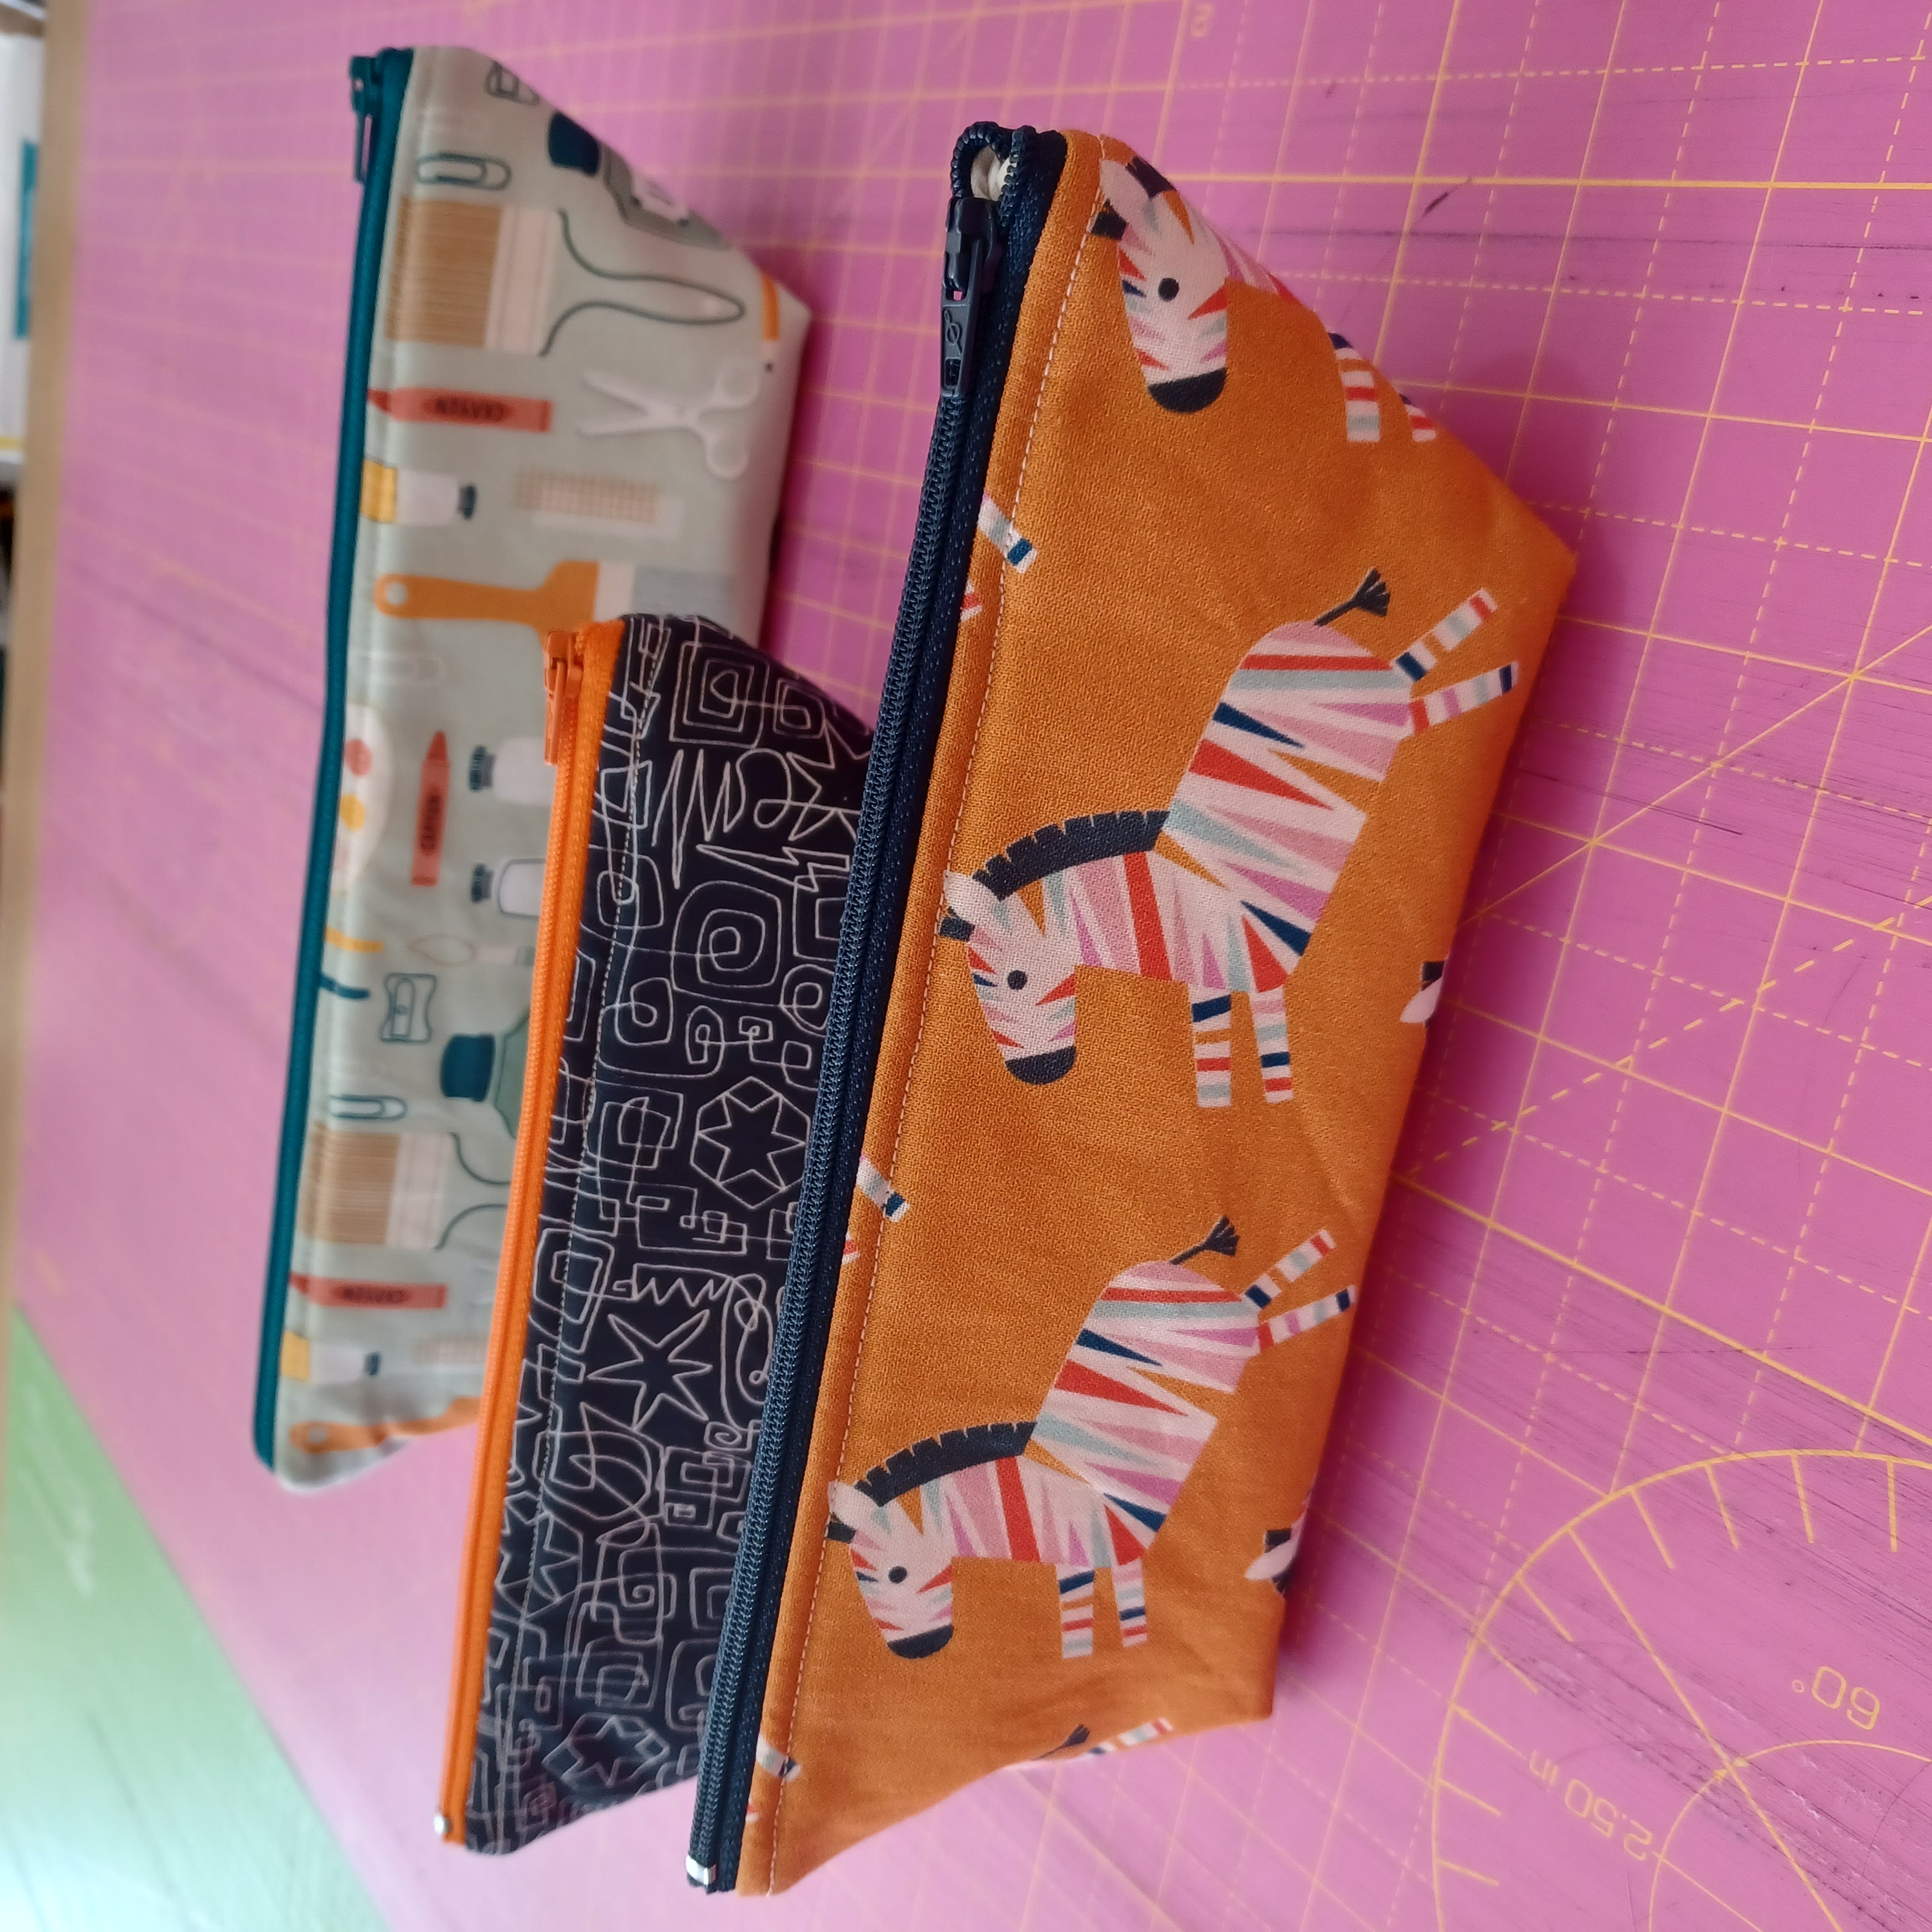
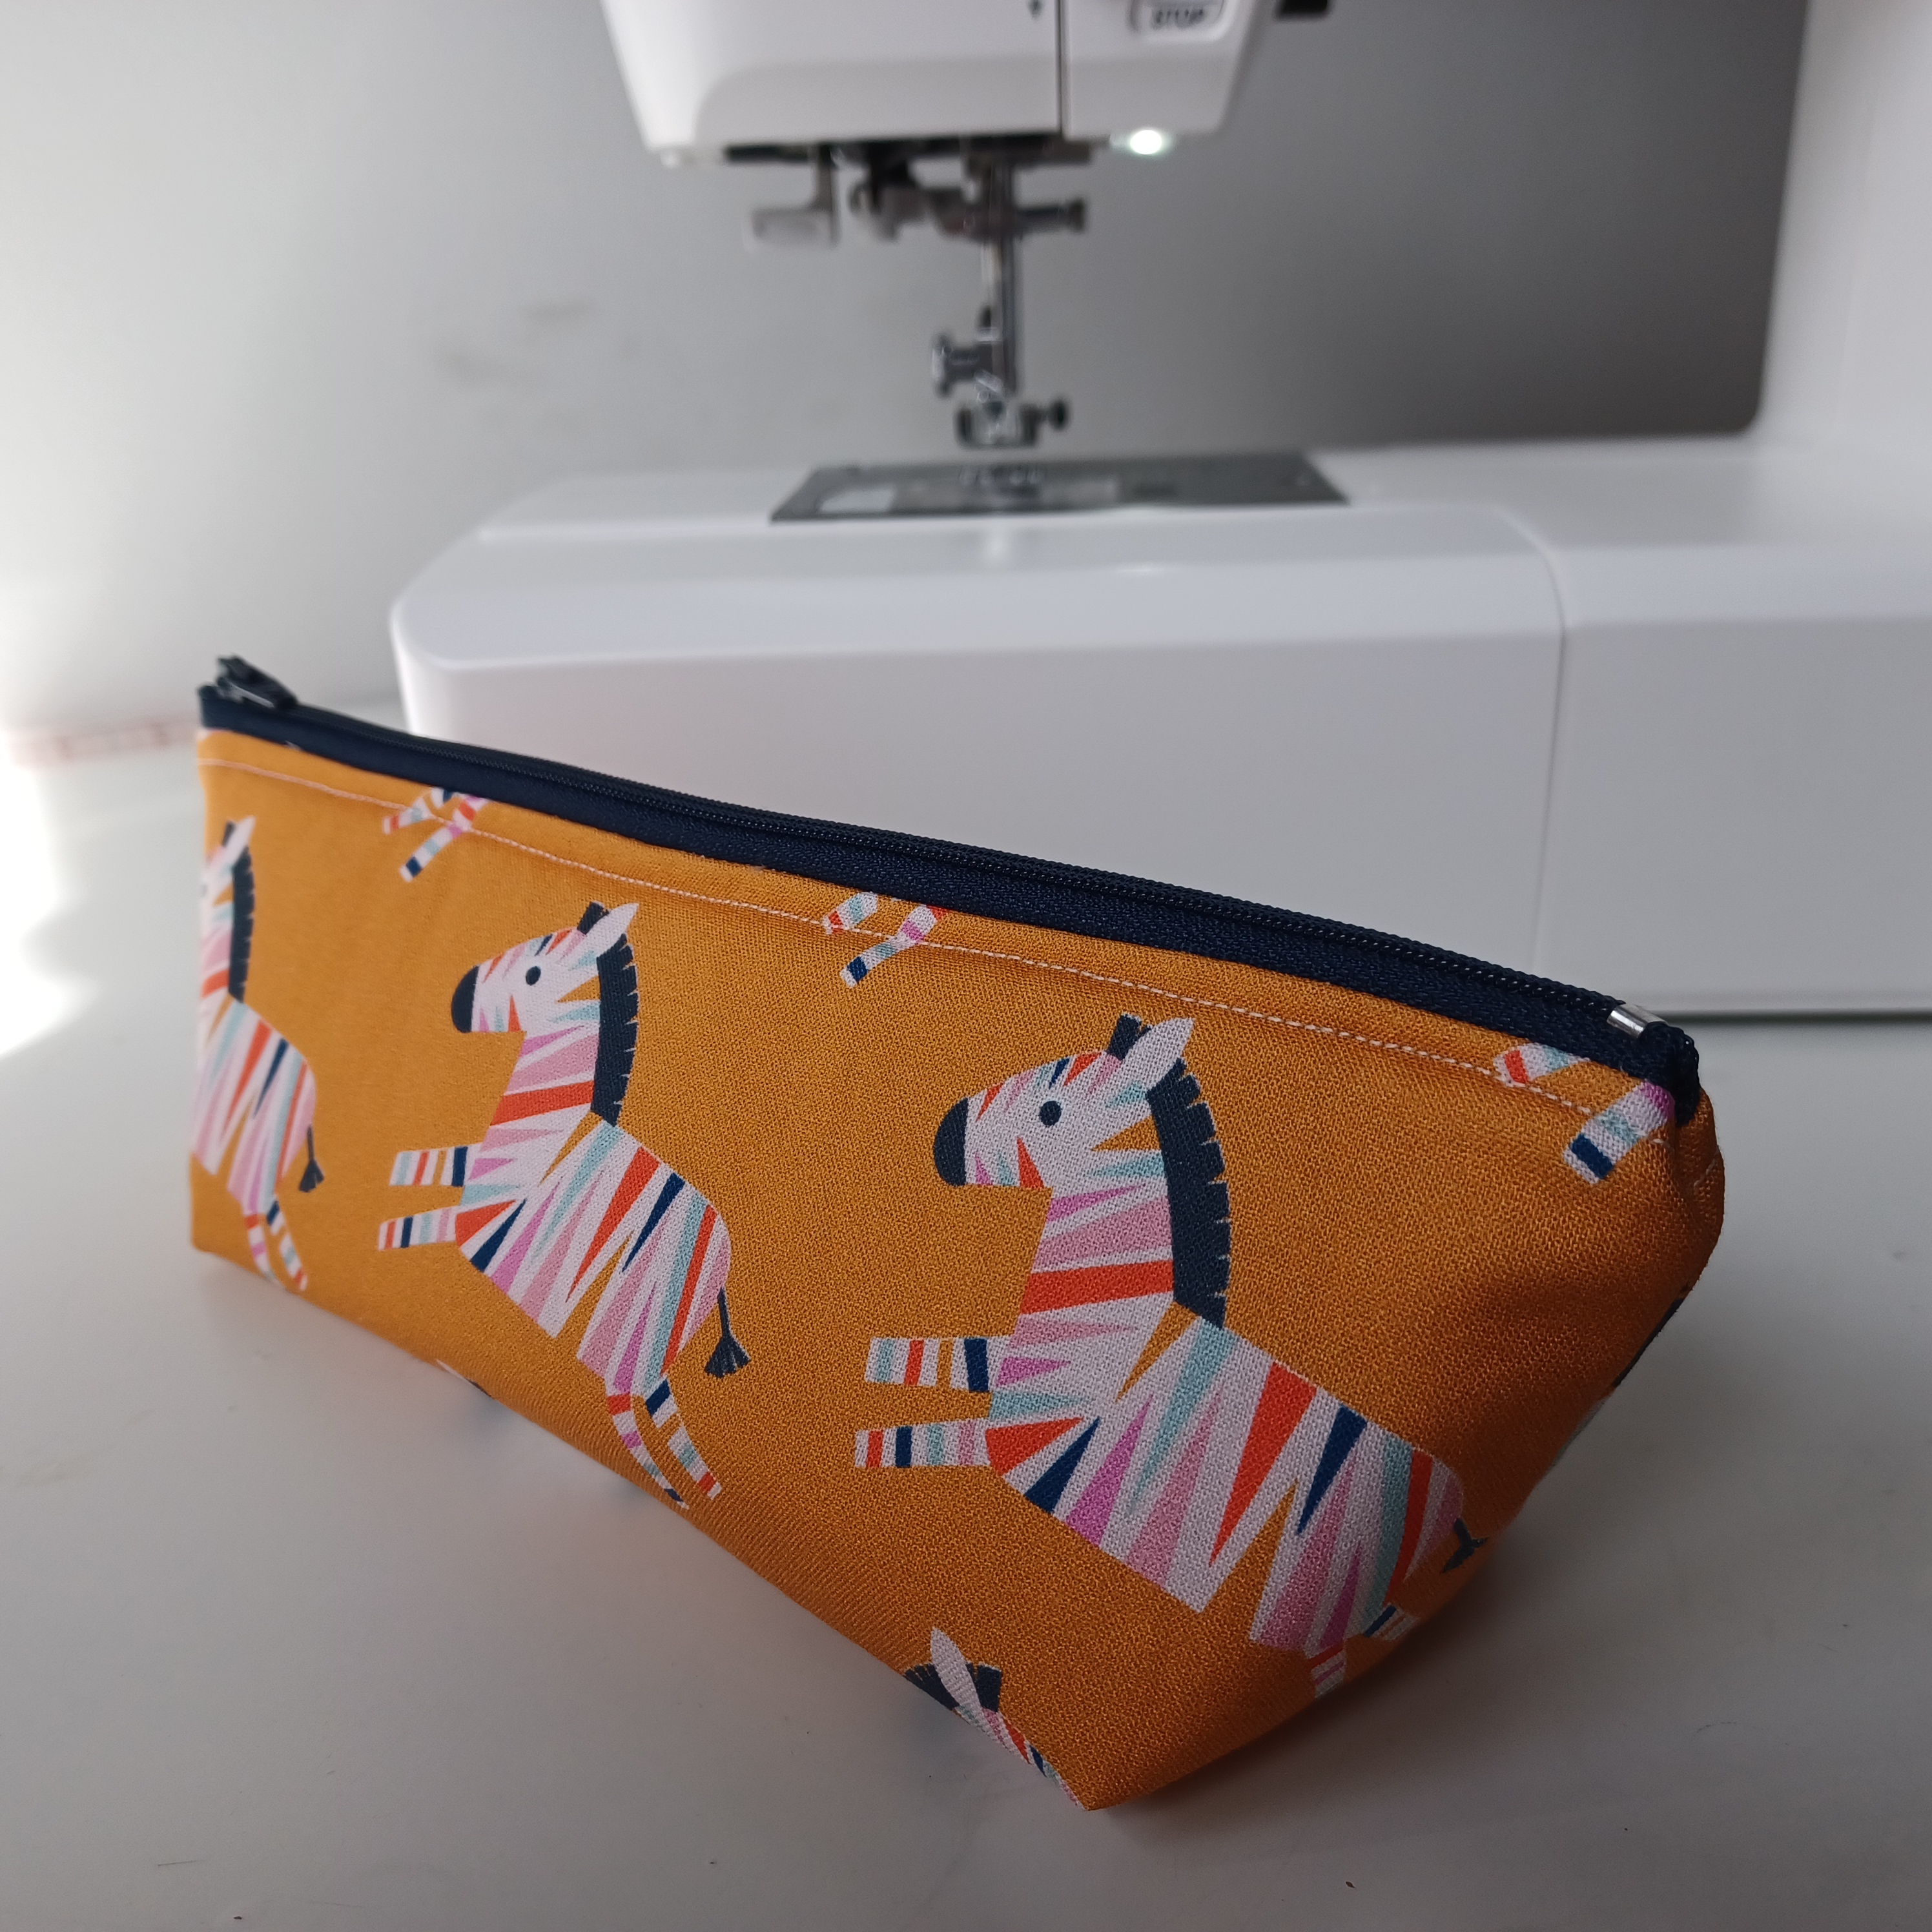
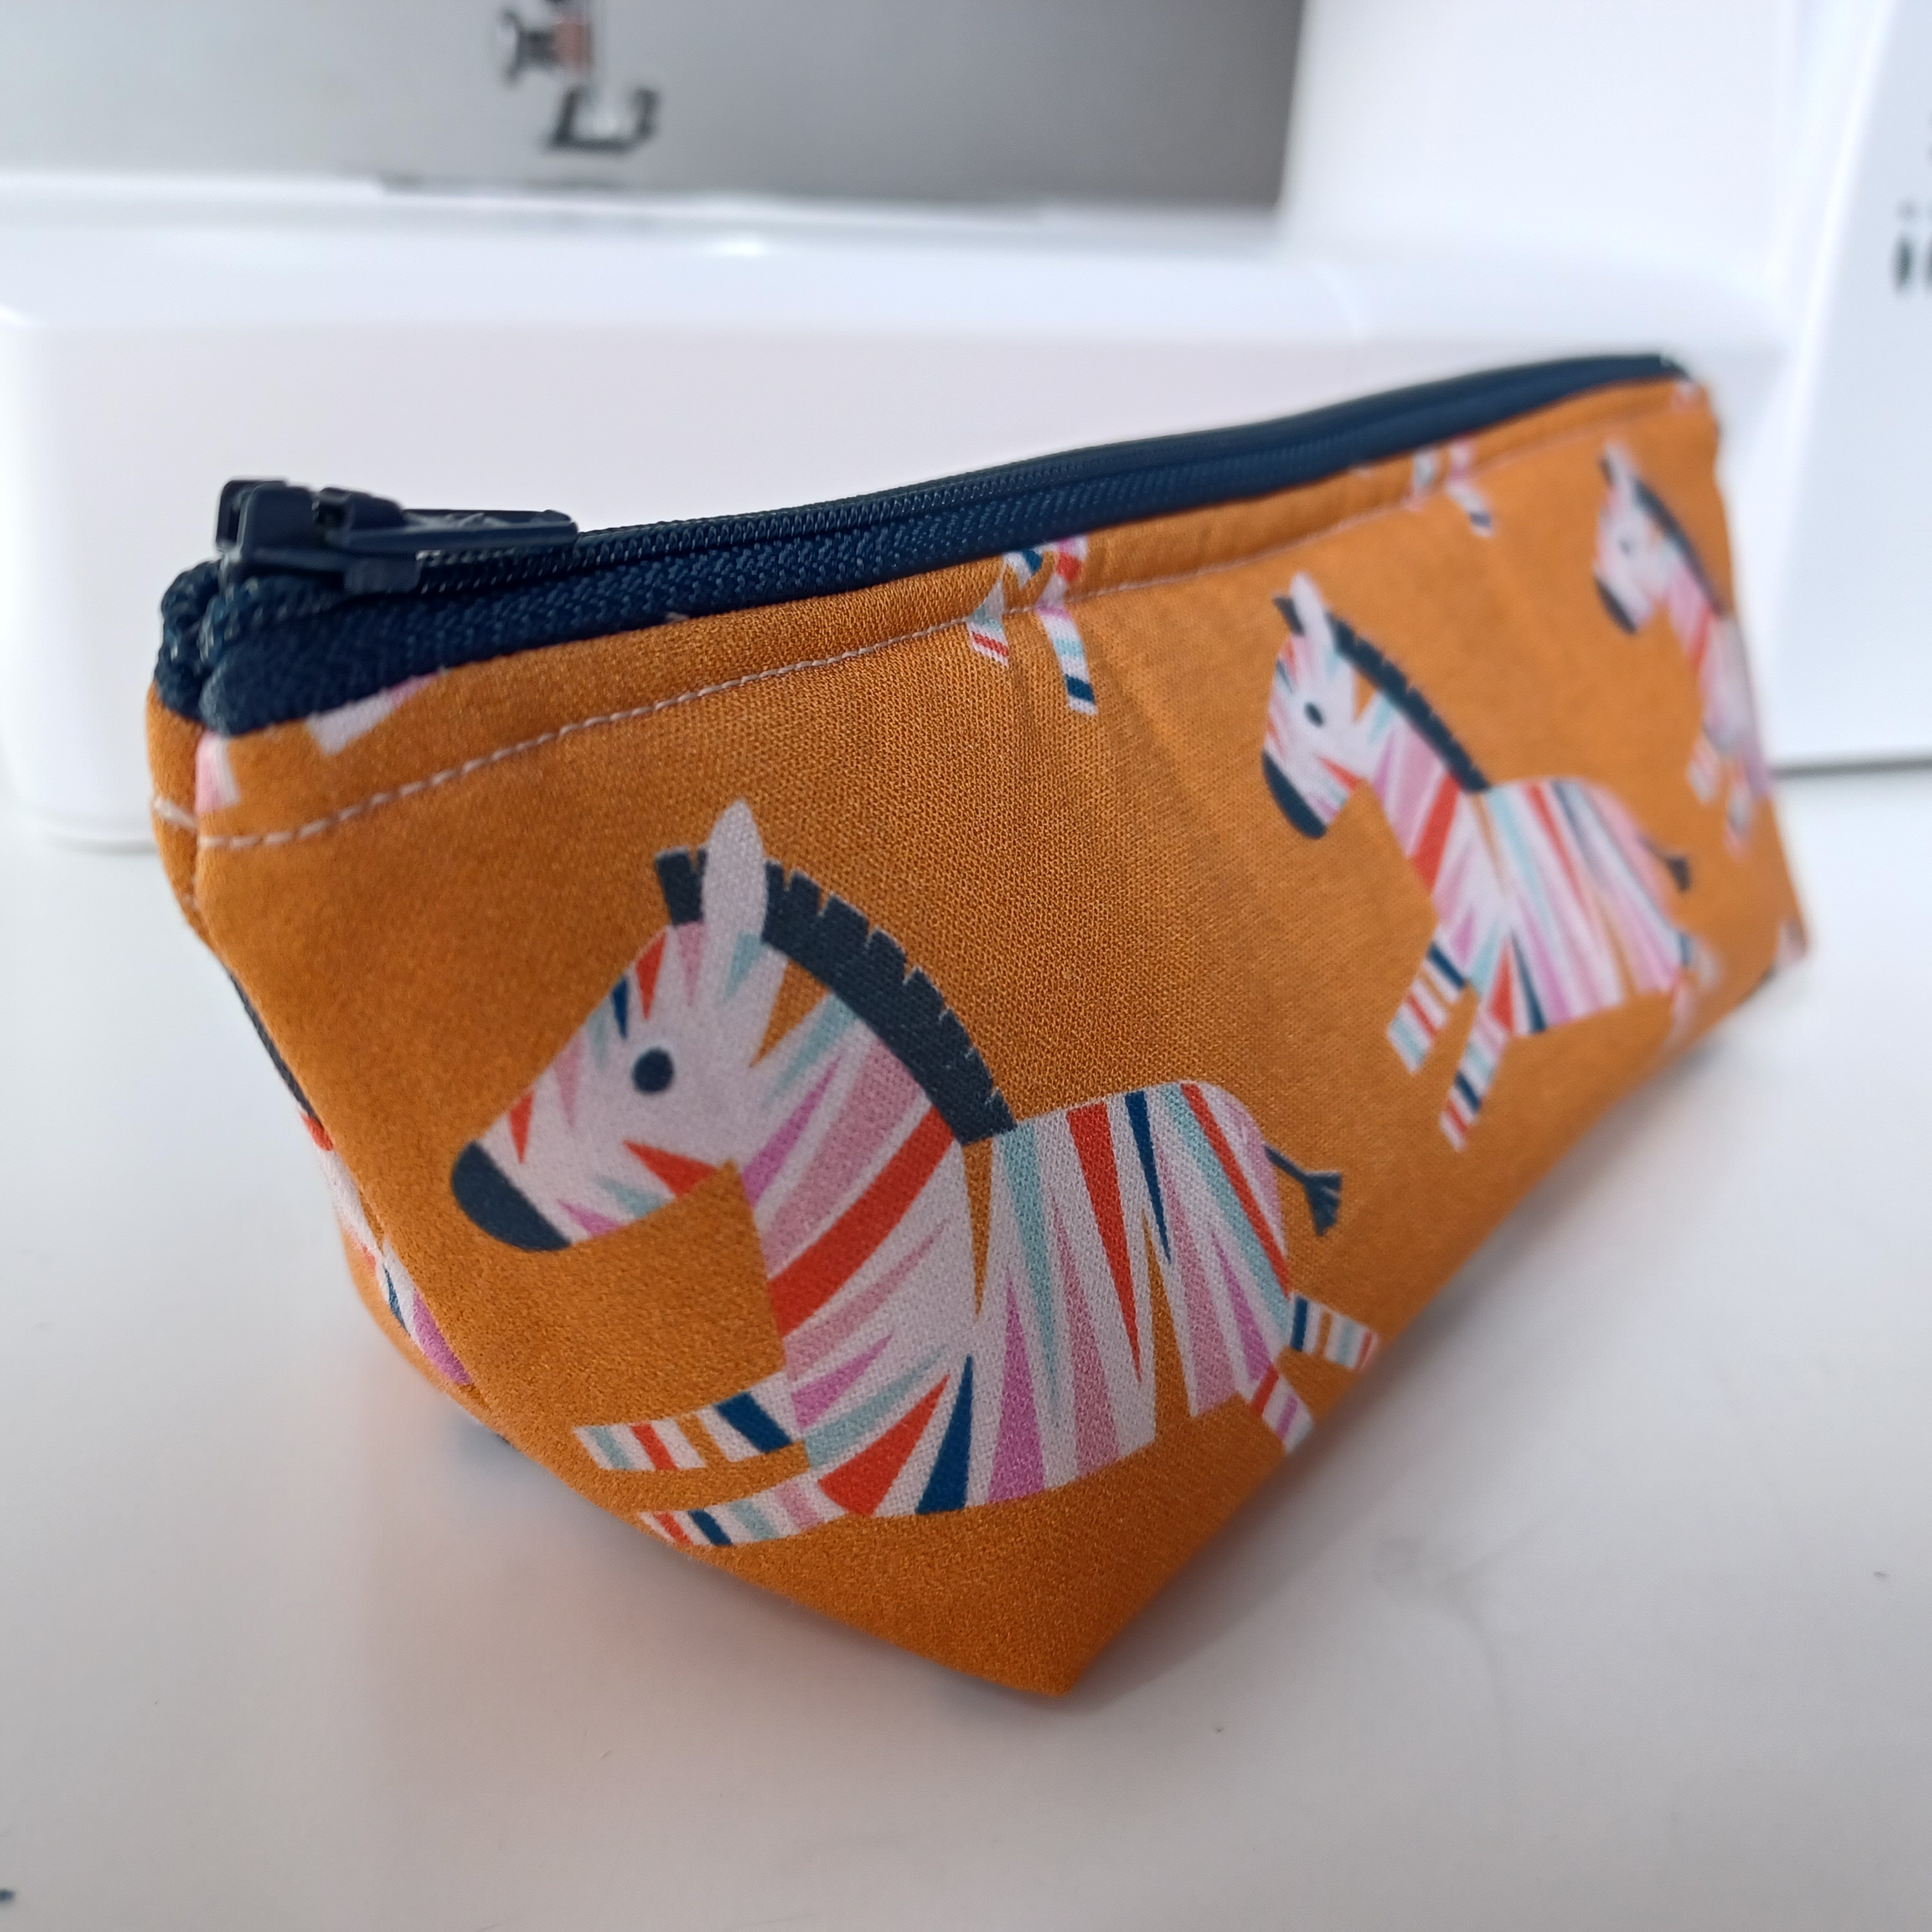
FINISHED SIZE: (Zebra)
9″ length of top (zip), 3″ height, the base becomes a rectangle 2-3/4″ x 6.5″
** BUY the SUPPLY ONLY kit here while stocks last. **
But first some prep!
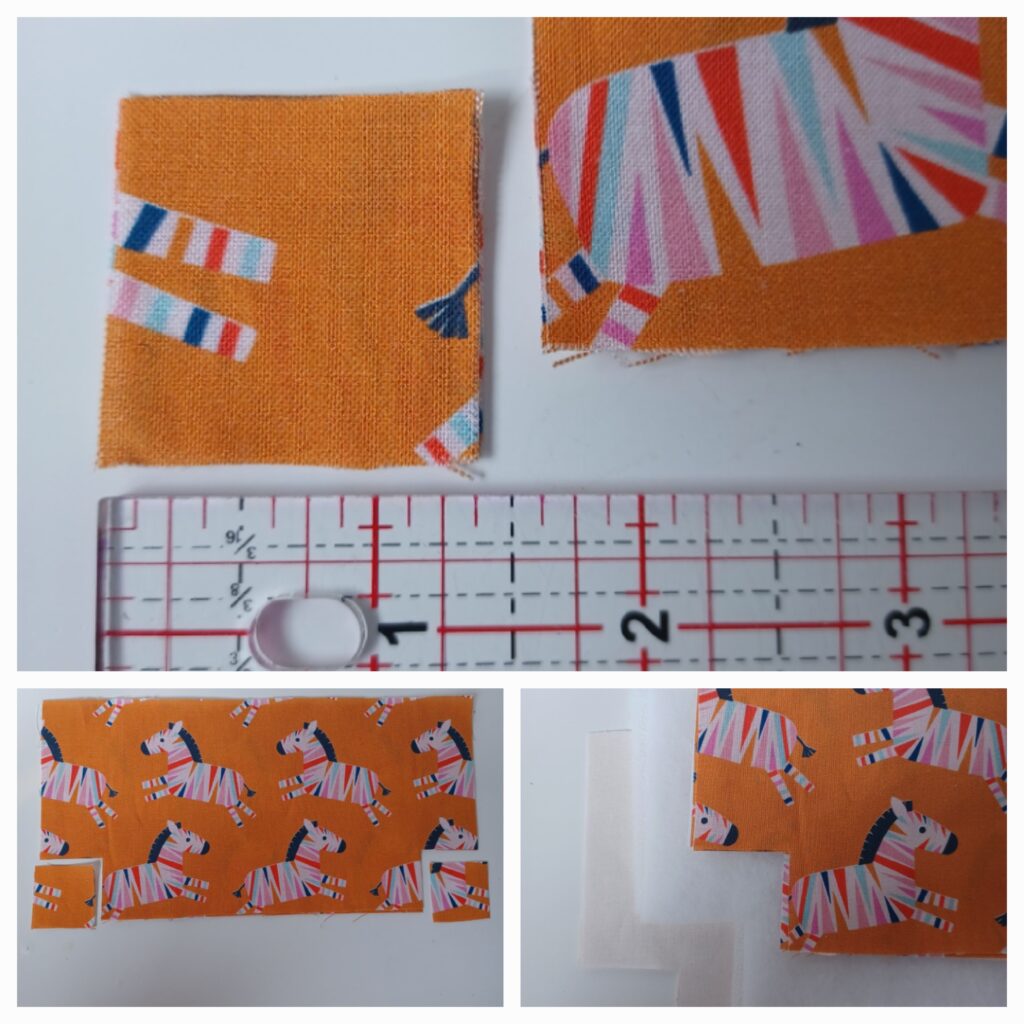
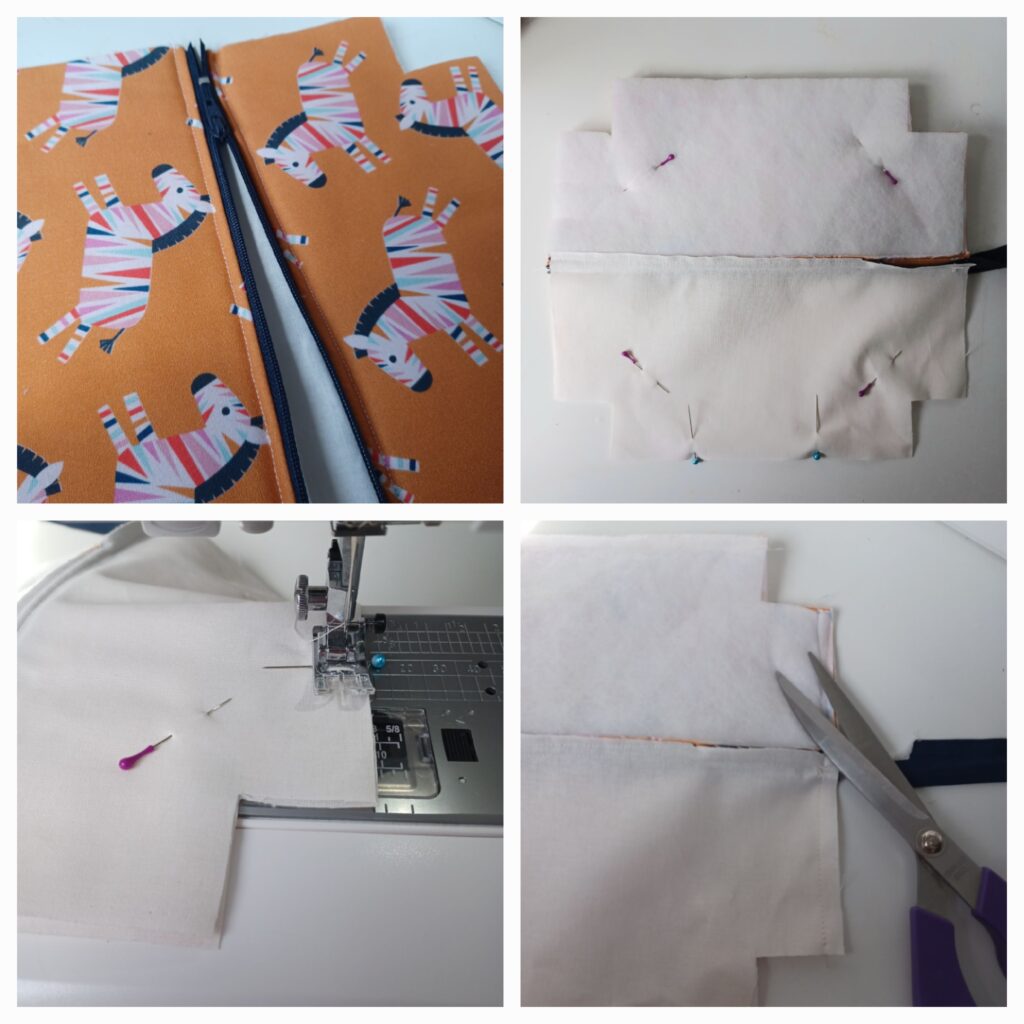
Cut out a 1-3/8″ square at the bottom left and right of the outer fabrics, repeat with the lining. This is for your boxed corners. If you are going to make more than one of these pouches, then make yourself a wee cardboard template of the square.
Iron the fusible interfacing onto the reverse of the outer fabric.
We used fusible fleece but you can use medium/firm interfacing H250, or a sew in one like S13 which gives stability without being stiff.
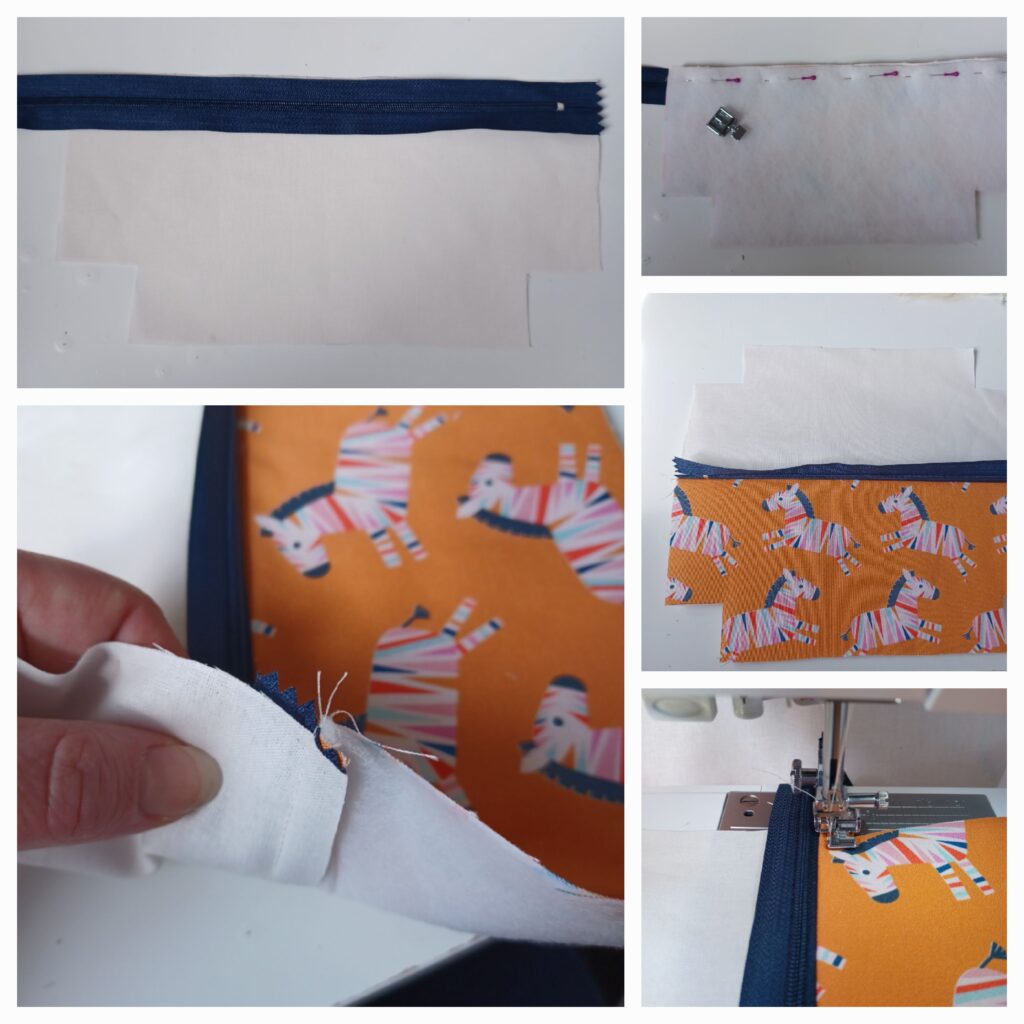
Layering the fabrics with the zip.
Lay down the lining fabric (if you’re using a print make sure the print is right side up).
Zip next, right side up, lay on top of the lining. The zip stop end (opposite from the pull) is flush with the side of the lining, as well as flush with the top edge of the lining too. (You can pin these to hold in place whilst you add the next layer).
Outer fabric, right sides DOWN, and pin in place.
Change to your zip foot and sew all 3 layers together, with approx 1/4″ seam. Open out and press the lining away from the zip, and the outer fabric away from the zip.
Optional Topstitch the outer fabric to the zip tape and ‘seam only’ of the lining. Keep the lining fabric out of the way. See photo bottom left of what the underneath looks like, before top stitching.
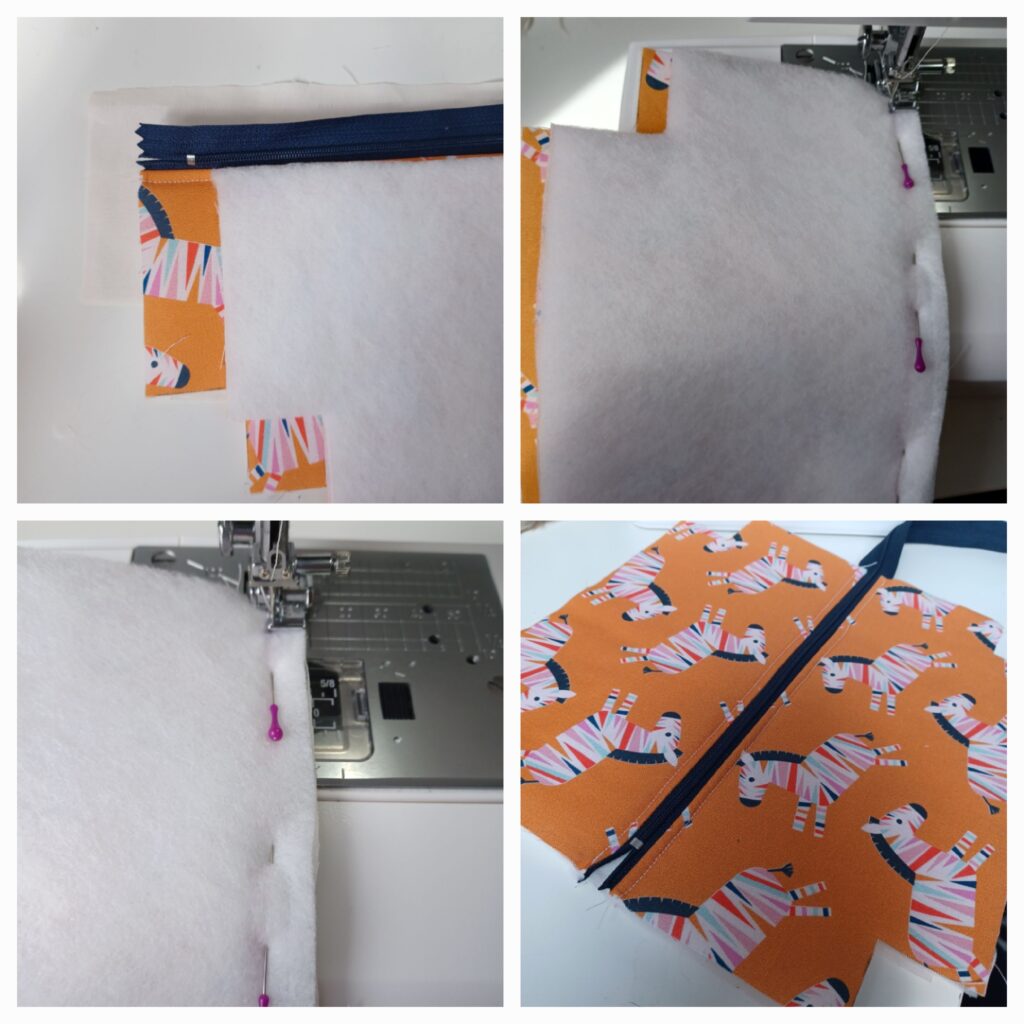
Repeat for the other side of zip!
Repeat the above steps to attach the lining and outer fabrics to the other side of the zip.
Layer lining, zip (fold fabrics back to reveal the un-sewn side of the zip) and outer fabric on top. Pin, sew and top stitch as before.
Open out and press fabrics away from the zip.
Sewing the pouch together …
Open the zip more than half way!
Fold the 2 outer fabrics right sides together and pin. Do the same with the lining fabrics. Make sure the zip is folded in half here, if you have topstitched then the zip teeth will naturally fall towards the outer fabric. Make sure the zip teeth at the open end, are lying directly on top of each other.
With pins, mark a 4″ gap in the bottom, centre of the lining.
Beginning at the left side of the gap (as you look at your pouch), sew around backstitching at the start and end of each seam. For seam allowance, instead of measuring , just line up the fabric to the edge of your sewing machine foot. DO NOT SEW the cut out corners, these will form our box corners, you are just sewing the bottom, side, top then the other side.
Trim the excess zip length off.
Box the corners …
Open out the corner to create the box shape. Match the side seam to the bottom seam, open the seams out flat.
Pin to hold the corner flat. The seam will be in the middle of the section you are about to sew. The inner corners of the original square you cut out, now become the sides.
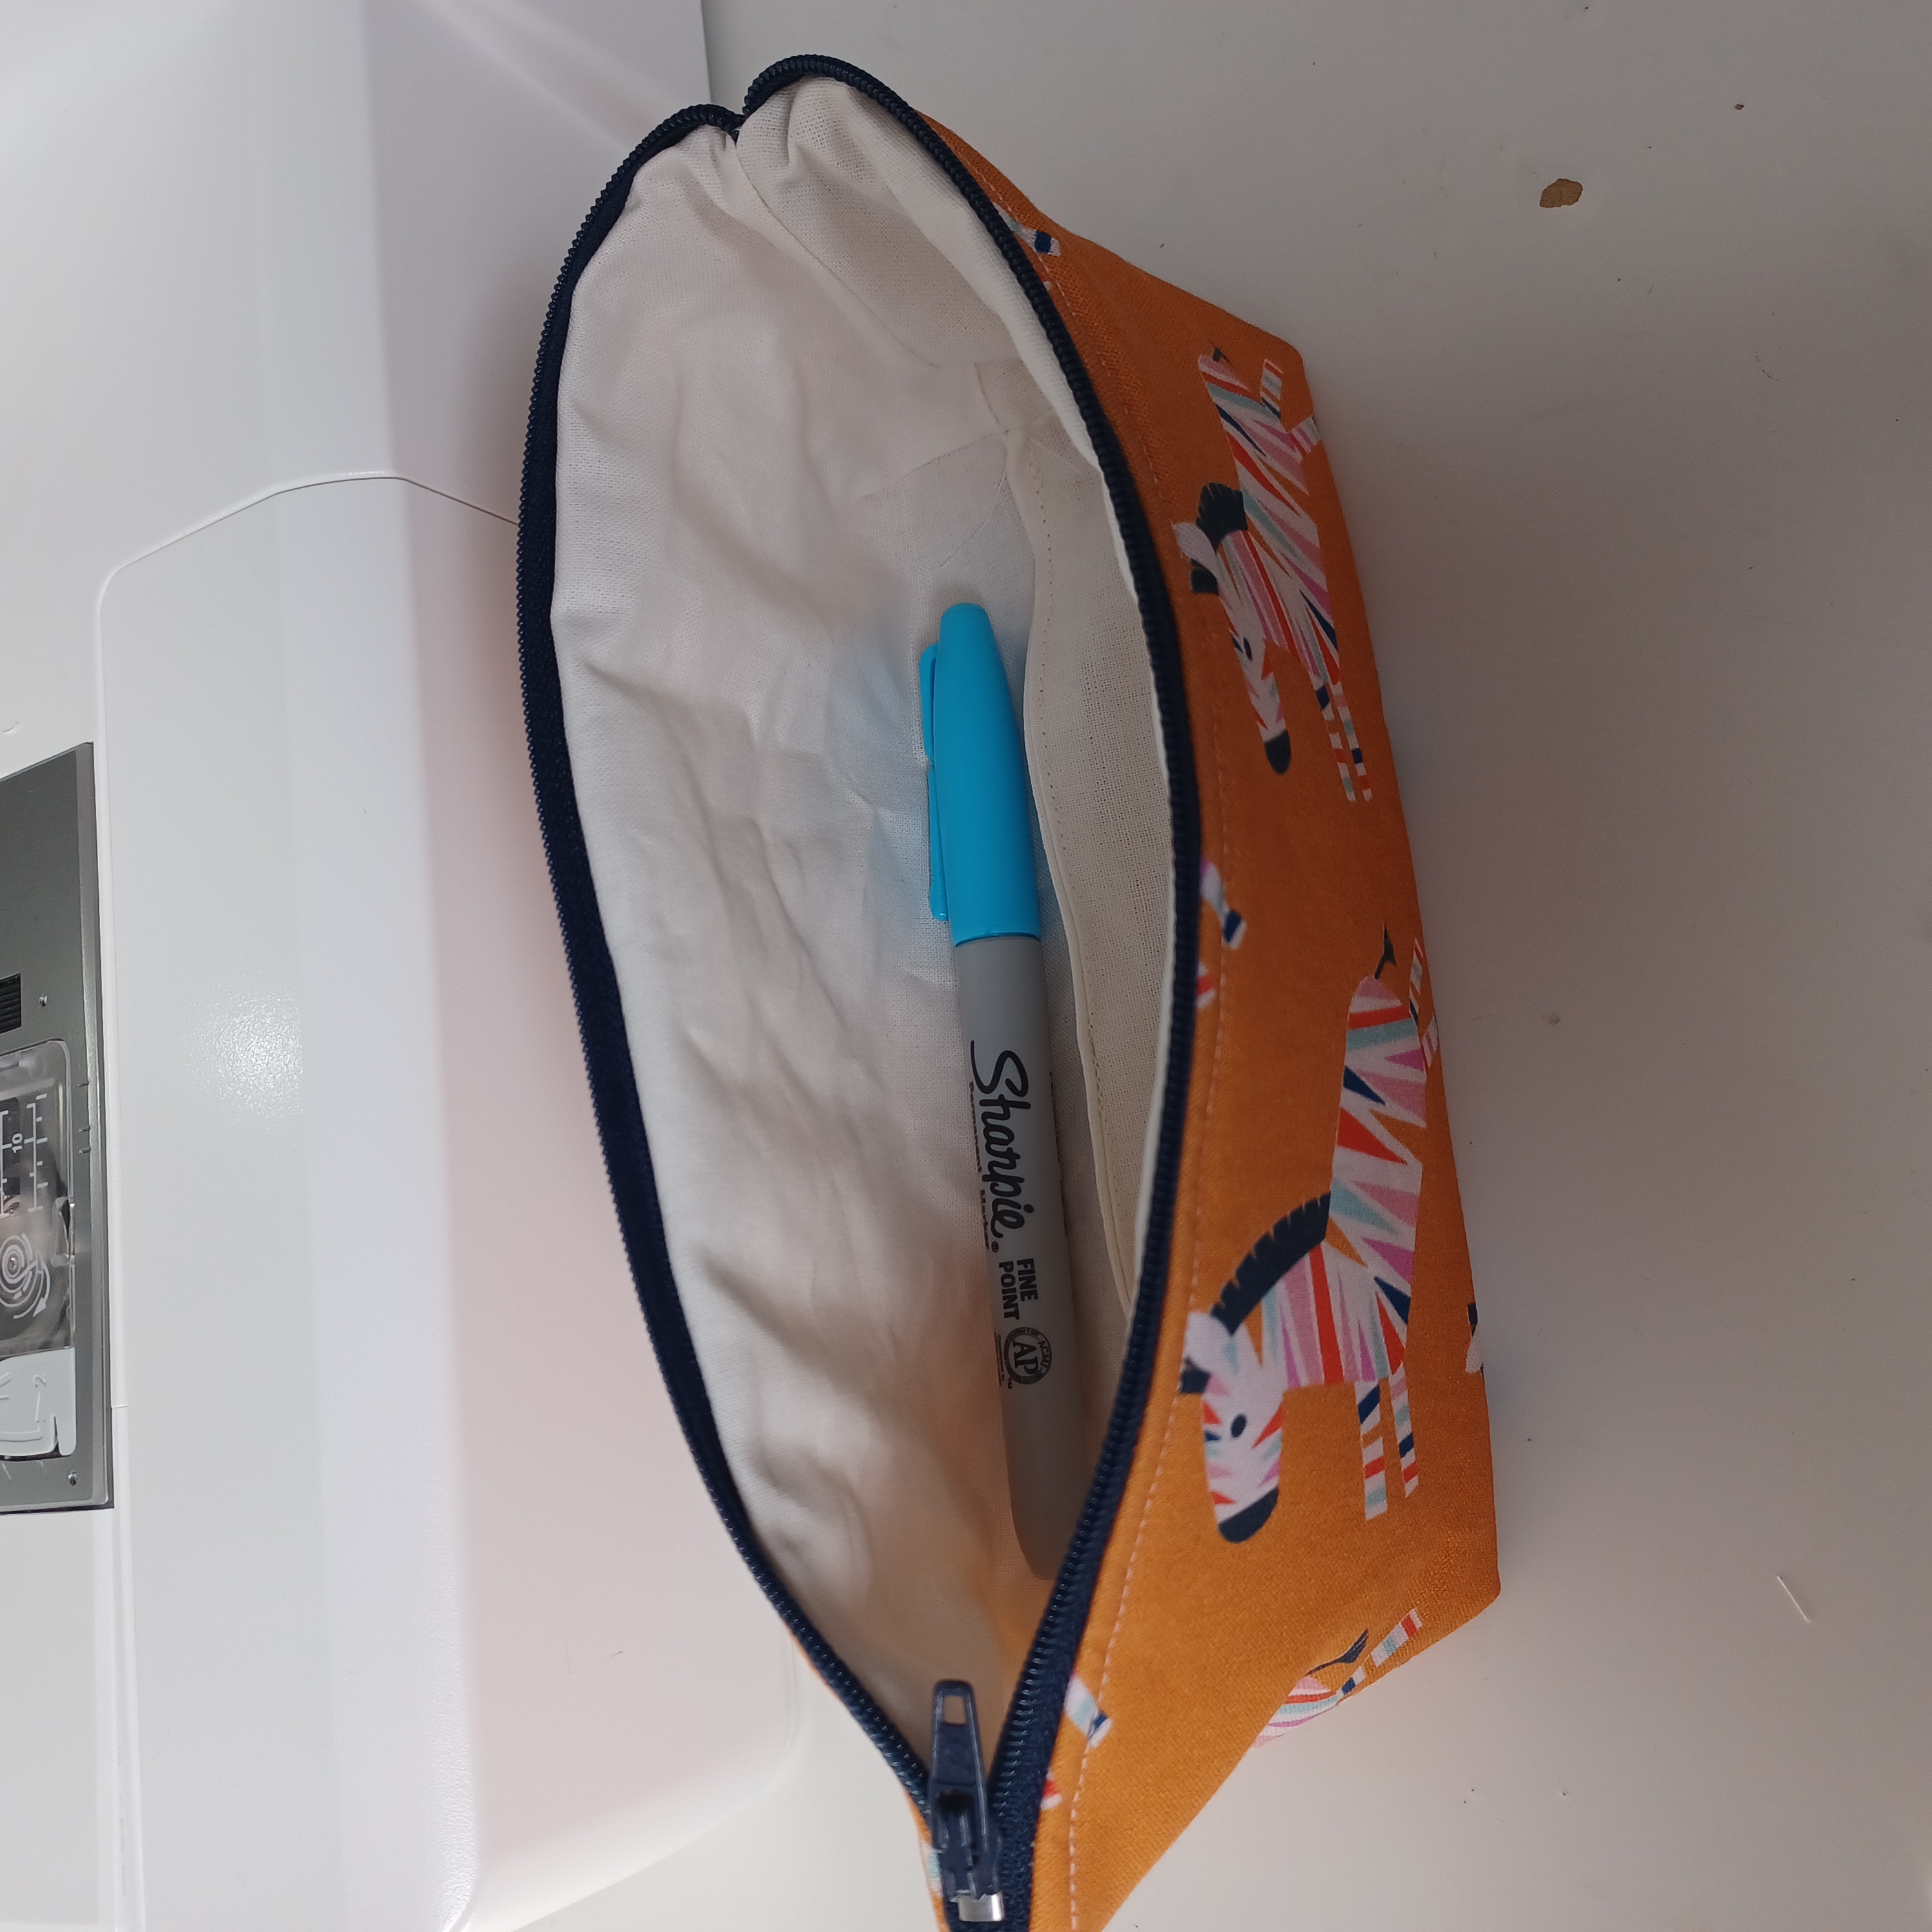
Repeat for all 4 corners. Snip any threads and turn your pouch out through the gap in the lining. Hand stitch the gap closed, or if you prefer to machine sew it, iron it flat first then sew as close to the edge as possible, closing the gap. Give your pouch a final press!
Woo hoo fabulous work, well done!
** BUY the SUPPLY ONLY kit here while stocks last. **