
Fabric, Dressmaking Patterns, Haberdashery and Classes, INVERNESS Highlands.

We decided to spruce up our wee kitchen here at the shop with some new tea towels made from white waffle we had left over from a project. The fabric was pre-washed and added some binding, cotton tape for hanging and a cute wee handmade button.
A fresh new look monthly newsletter!
Sewing tips, ideas, fabrics, patterns, special offers and things to watch, read & listen to !
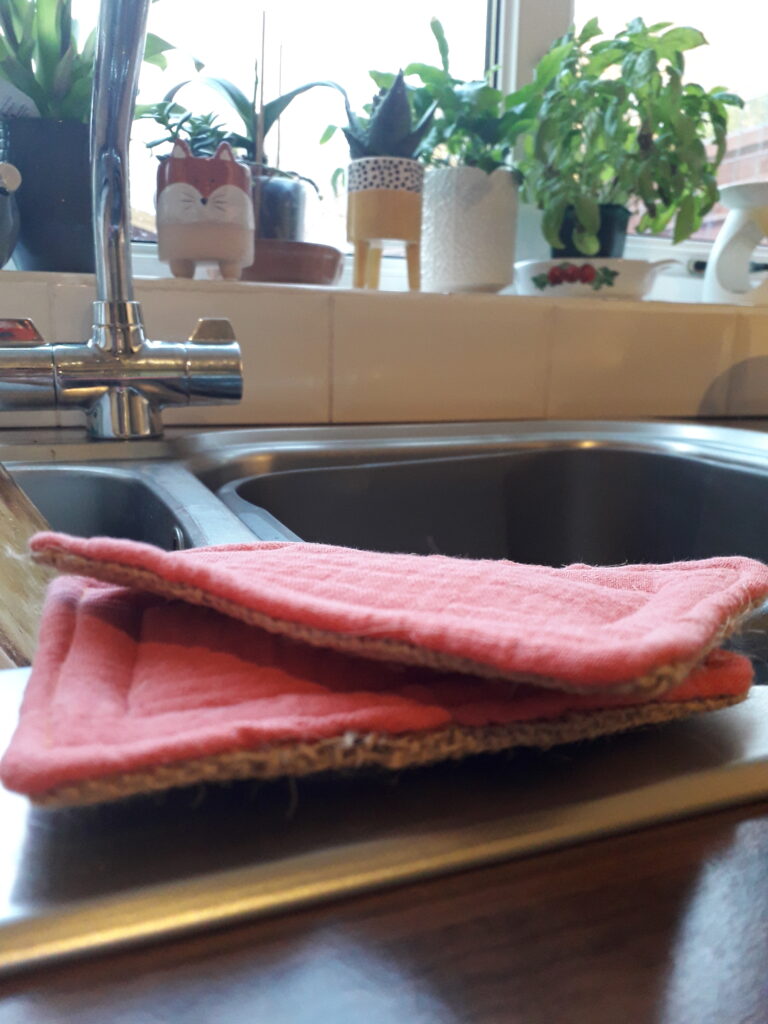
The unsponge meaning: Unsponges are little reusable sponges made from natural cloth. Used on kitchen bench tops to wipe up spills, wash dishes and to clean sinks or stoves.
I’ve made a few different cleaning clothes or sponge alternatives over the years and this is by far my favourite.
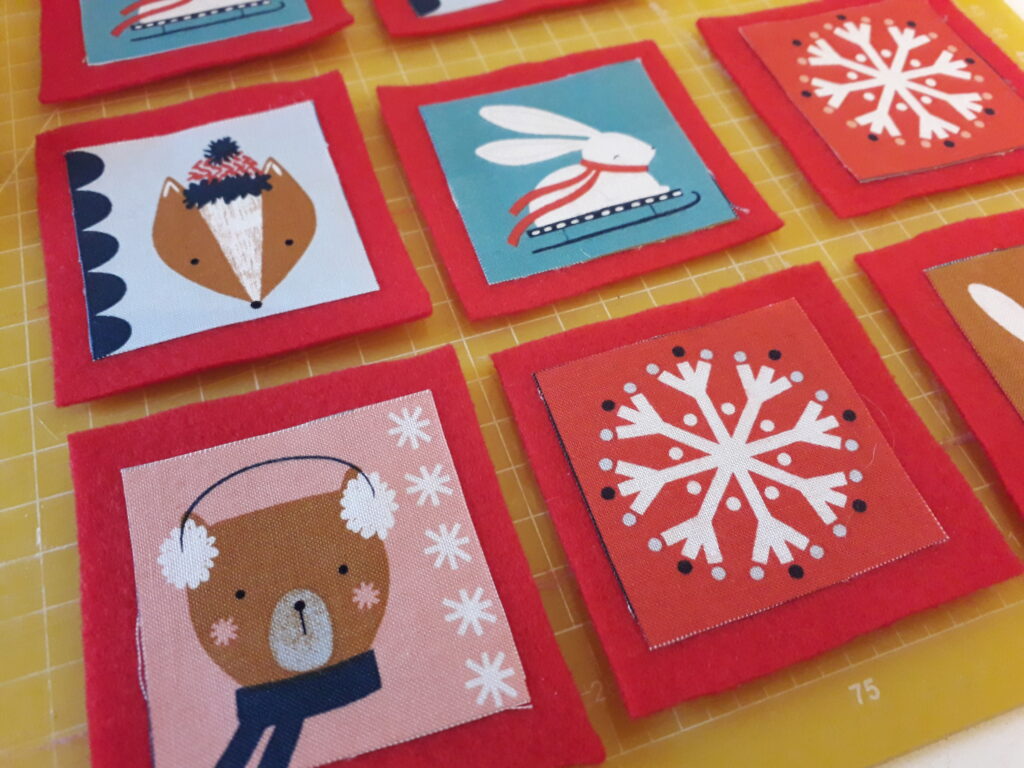
Cute wee game cards which you can easily make, even without sewing.
Creating little felt squares with the cutest characters from Dashwood Studios Winter range, Snow Much Fun.
Play snap, a memory game, make up a story or invent your own game.
So you’ve made your Tote bag and discovered it’s so basic, there is NO pockets!
We’ve put together a wee free pattern for you, to make a removable pocket you can loop around the handles.
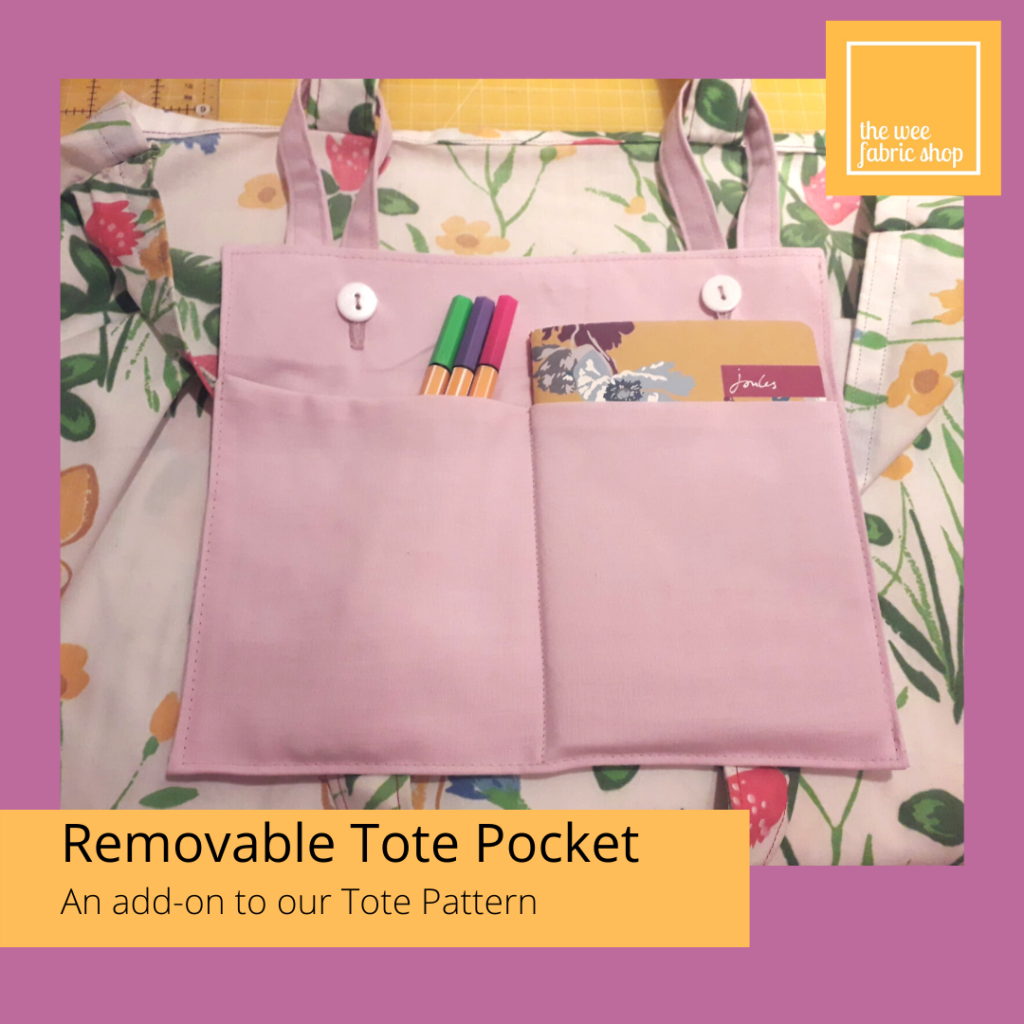
You can download our pattern instructions and photos here.
If you make this we’d love to see photo’s!
Whilst our pattern is FREE, if you wish to continue to SUPPORT OUR WEE BUSINESS especially through these times of having our doors closed, we would be most appreciative, click on this link to make a donation of £3.
Thank you from the bottom of our hearts …
Marice & Fiona xx
Not made the tote yet? You’ll find the original post here.
Tote bag or ECO shopper, simple enough for beginners to create and a great starting point for improvers to modify, adding pockets and closures.


The humble tote bag is a staple in everyone’s life now. Whether you are here to sew it for the first time, or to adjust it to make the size to suit you, we hope you find the instructions easy to follow.
If you are not brave enough to cut into your ‘good’ fabric this is the perfect project for old duvets and curtains.
Download the INSTRUCTIONS here, there’s a written guide and accompanying photos.
As always we would love to see your makes, you can share via our facebook page or tag us on Instagram #sewweefab … Marice & Fiona xx
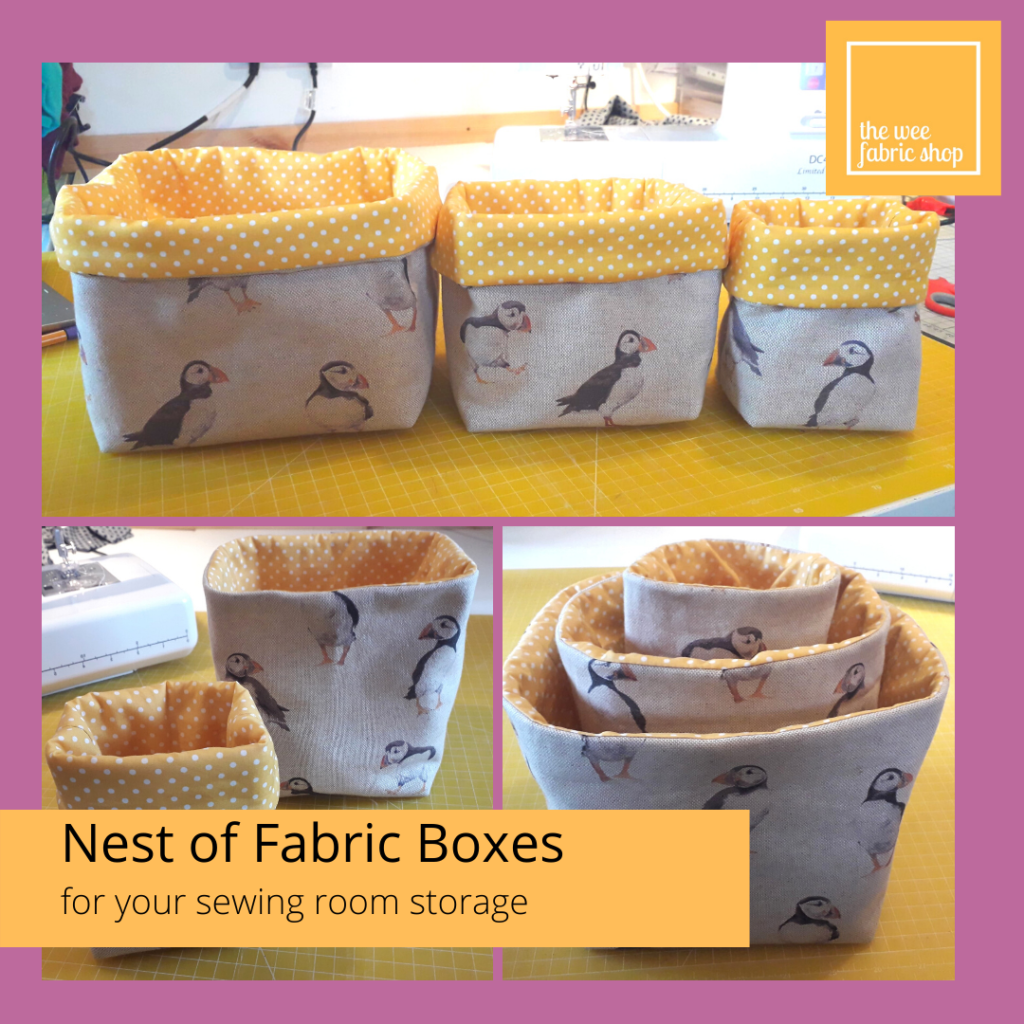
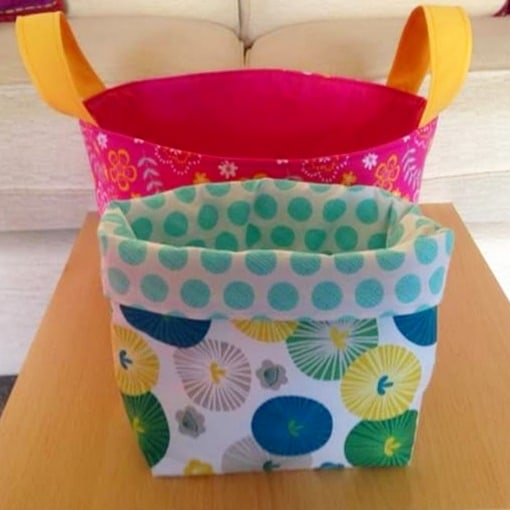
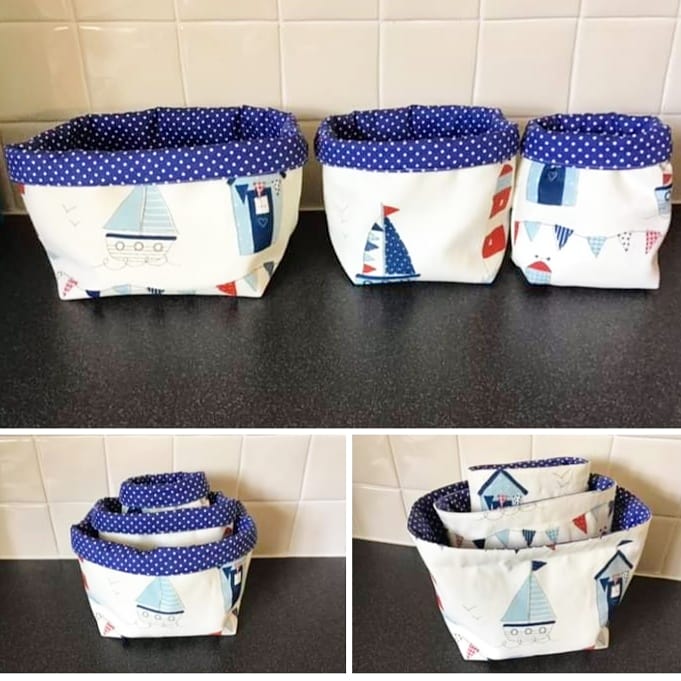
What better way to personalise your sewing space, than to sew yourself a nest of boxes.


We’ve created our own nesting fabric boxes pattern for you to make. Here’s the list of what you need to make all 3 sizes.
* If you have no wadding, you could use interfacing, failing that if you are sewing with canvas or denim you could get away with nothing at all.


Here’s what you need to make your own:-
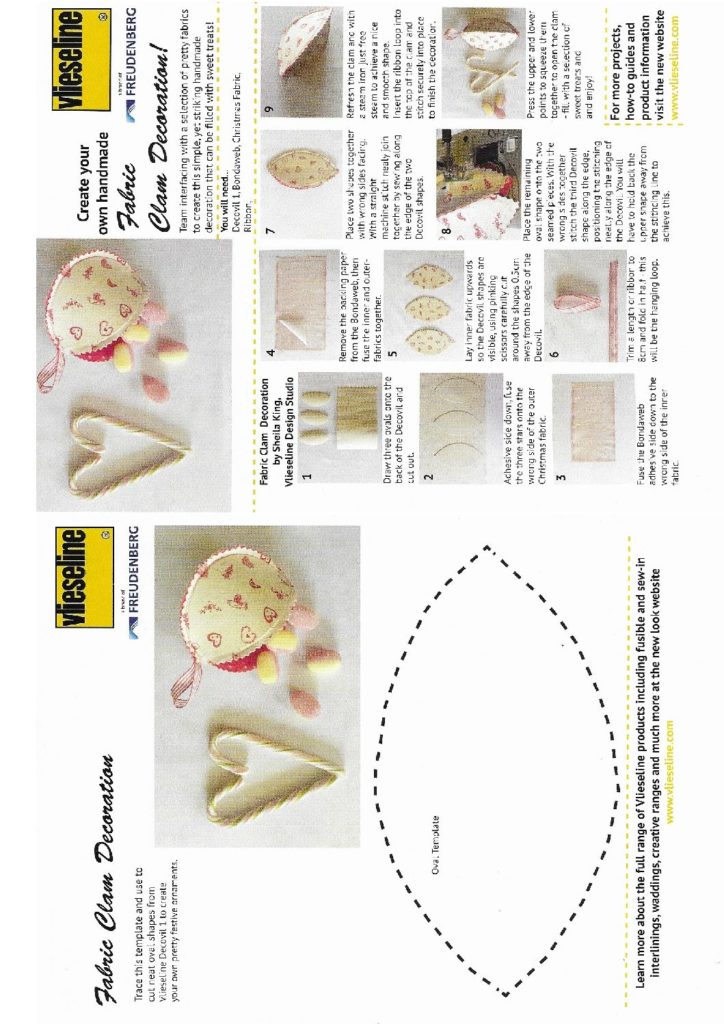
This project I found on the Vlieseline (previously known as Vilene) website. You can download pattern and instructions here.
If you have not used decovil before then this a fantastic little project to have a go. Mainly used by bag makers, with it’s leather like form, decovil really holds it shape. Tear-resistant, but also dimensionally stable and easy to shape. Furthermore it is resilient, resistant to bending, punchable and the cutting edges stay tight. Thereby the fixed fabrics are good to handle and very stable and durable. Ideally suited for the creation of hats, belts, bags and small fabric bowls, but also, for interior decoration. It’s an iron on stabiliser, the shiny side is the glue. Suitable for cotton, decorative and synthetic fabrics. Machine wash 30o.


** At time of writing this, we stock Decovil in a pre-pack sheet size of 45cm x 50cm, if you love it as much as we do, we will look at stocking Decovil on the roll. Which would mean a 90cm width by whatever length you would like.
We would LOVE to see your makes! Fiona & Marice xx
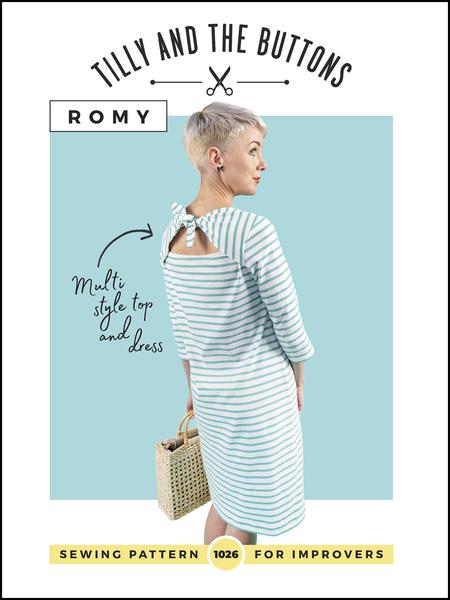


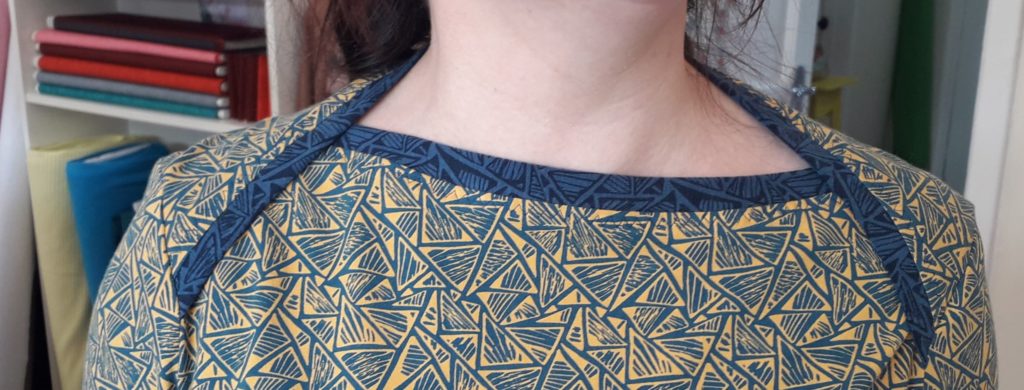
Romy is one of Tilly’s tops for stretch fabrics. It’s standout feature is the unusal neckline, which is not unlike those on babygrows. This is an advantage if you don’t want to spoil you hair-do when getting into it!
Fiona and I both liked how the top is constructed, the pattern pieces for the front and back have straight necklines. An easier option, given that there is no round neckline to tackle, so no wrestling with stretching in a neckband. The crucial part of the process is the accurate marking of the notches, a very important task when constructing the Romy, paying close attention to the correspending nothces for the version you are making.
Fiona : Height 5’3″ / B 47″ / W 39″ / H 45″. Made a SIZE 8.
Marice : Height 5’0.5″ / B 37″ / W 31″ / H 40″. Made a SIZE 5.
NECKLINE
MARICE : whilst the photo may look a little squint, my neckline does sit well, a little higher than I am used to. Normally wearing a crew neck, or V neck.
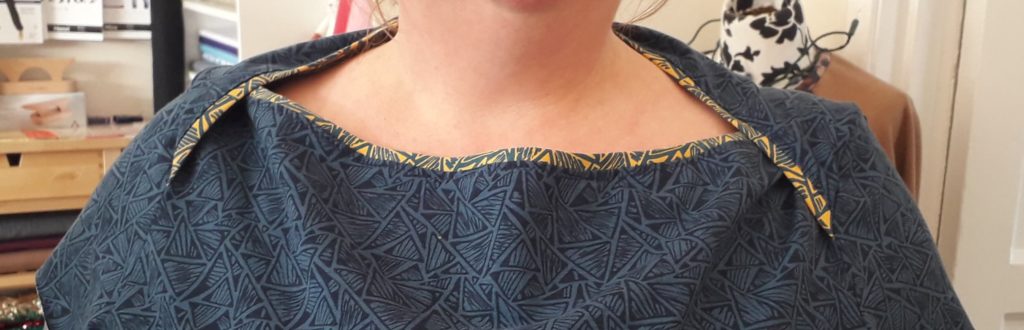
FIONA : as you can see in the photo, the neckline is far too wide and very loose, bagging. Unfortunately it is the same at the back of the neck with far too much fabric. Whilst I made a size 8 to fit my chest size, it has meant the pattern has assumed I am larger all over. Marice and I measured our shoulder widths and interestingly we measure exactly the same. The issue here is that I carry most of my excess weight in my chest and tummy while still having a small back and narrower shoulders – there’s a lot I need to do to adjust this to fit correctly. One of my favourite knit top patterns is the Tilly & The Buttons Agnes, which fits me perfectly so I was a little disappointed that this wasn’t the case with Romy.


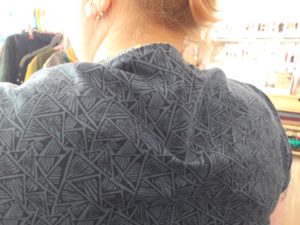
MARICE : SLEEVES are too long, it’s usual for me to shorten by a couple of inches, I’ve not cut shorter yet, as I wanted to see how the pattern comes out true to size. My fabric has a print on the rightside and plain on the wrong side. I’m considering rolling the sleeves up? Not sure yet. I might live with it and then decide. MAIN BODY As you can see in the above photo (middle) I kept pulling the back of my t-shirt down, it wasn’t sitting correctly on me (right photo). Totally expected though, being shorter, the waist needs to be higher up, this is an adjustment I will make to my pattern pieces before I sew the next one. I’ve yet to hem my Romy, but in a lazy way, I kinda like the way the mustard underside rolls up.
FIONA : SLEEVES I made the cap sleeves so no issues here (although I missed the bit in the instructions to hem them before stitching to main body and sewing up the sides!) MAIN BODY Despite the problems with the neckline I actually really like the fit in the body, the Romy is not fitted but it’s also not too boxy so I think the shape is flattering for a variety of different figures. Overall this was an enjoyable sew and as always Tilly’s instructions are well written and very easy to follow. I’ve got quite a bit of work to do to the pattern if I am to make another one but will, of course, update you all on my progress.


Here’s the short sleeved version I made last year … you will have probably seen these photos on our social media. Sadly we have sold out of our hippo fabric, but there will be more funky prints for you to choose from.